Build Forms Dynamically using Directus and SvelteKit
Directus' data studio allows you to create data for your collections. You can then leverage these collections with SvelteKit to generate dynamic and interactive forms for your application.
Before You Start
You will need:
- A Directus project with admin access.
- Fundamental understanding of Svelte concepts.
- Optional but recommended: Familiarity with data modeling in Directus.
Set Up Your Directus Project
In this tutorial, Docker will be used for the setup. To get started, follow the Docker setup instructions.
You also need to make sure to configure CORS. Update your docker-compose.yml file as follows:
CORS_ENABLED: "true"
CORS_ORIGIN: "http://localhost:5173"
CORS_CREDENTIALS: "true"
Create a Collection
Create a new collection called posts with the following fields:
title(Type: String)content(Type: markdown)slug(Type: String)category(Type: Dropdown with options ofblog post,tutorialandannouncement)published(Type: datetime)
On the data model page for the 'posts' collection, click the three dots next to the 'slug' field and pick 'half-width' to reduce the field's width to half that of the form. Do the same for the 'category' field.
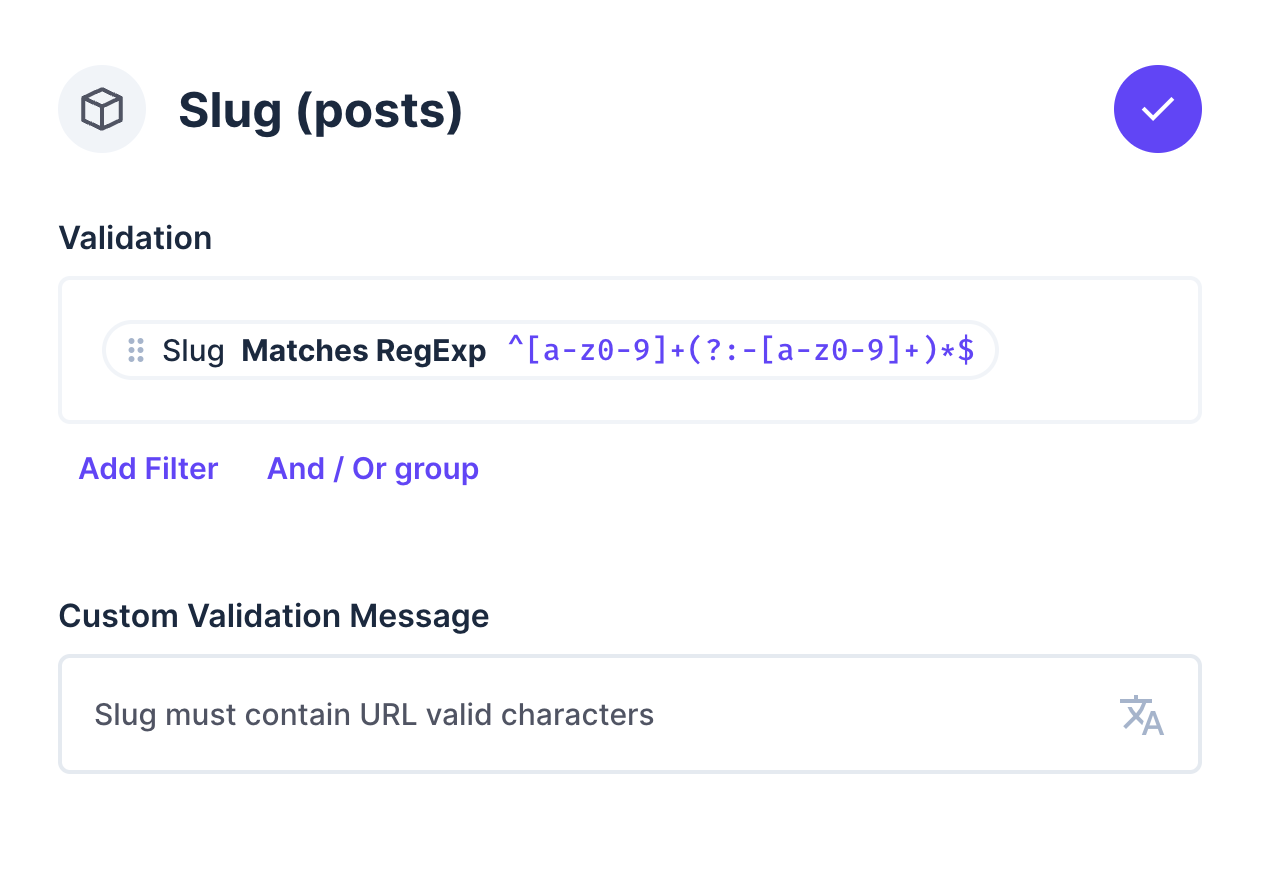
Add Slug Validation
Directus includes a default option that can be applied to the slug field to ensure that only URL-safe characters are used, but for the purposes of illustration, we will add our own validation to this field, which can be shared with SvelteKit on the frontend.
To validate the 'slug' field, select Validation and enter the Regex expression ^[a-z0-9]+(?:-[a-z0-9]+)*$. Add the custom validation message 'Slug must utilize URL valid characters' and save.
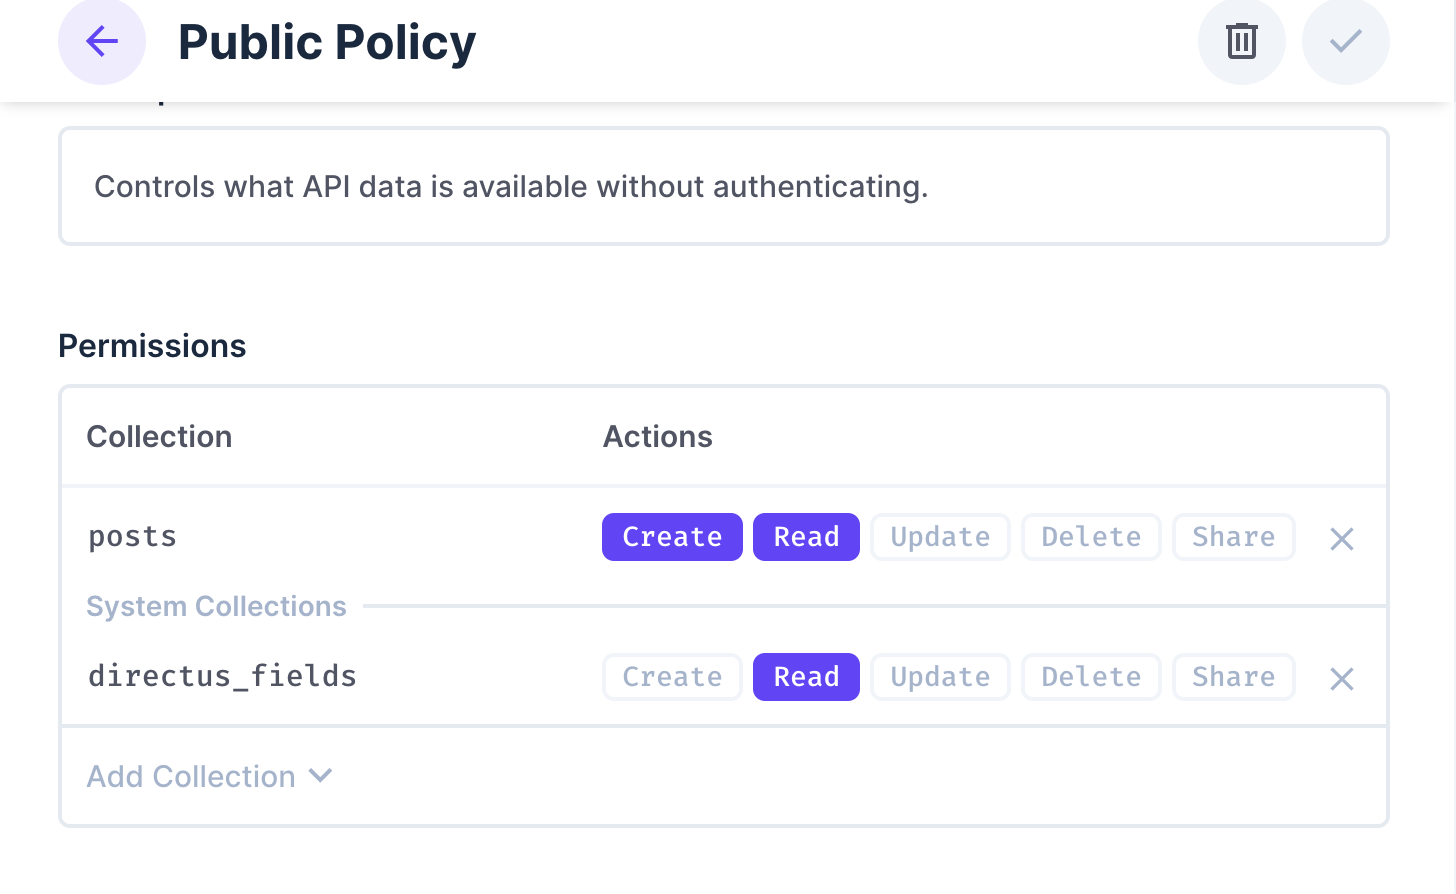
Edit Public Policy
You need to give your projects access to the post collections and other necessary fields. Navigate to Settings -> Access Policies -> Public. Under the posts collection, grant full access to read and write.
You also need to grant full access to directus_fields collection so your public policy looks like the image below:
Set Up Your FRAMEWORK Project
Initialize Your Project
To start building, you need to install SvelteKit and Directus sdk. Run this command to install SvelteKit:
npx sv create dynamic-form
When prompted, select SvelteKit minimal as the template. Do not add type checking, as this tutorial is implemented in JavaScript. Your output should look like this:
 Welcome to the Svelte CLI! (v0.6.16)
│
◇  Which template would you like?
│  SvelteKit minimal
│
◇  Add type checking with Typescript?
│  No
│
◆  Project created
│
◇  What would you like to add to your project? (use arrow keys / space bar)
│  none
│
◇  Which package manager do you want to install dependencies with?
│  npm
│
◆  Successfully installed dependencies
│
◇  Project next steps ─────────────────────────────────────────────────────╮
│                                                                          │
│  1: cd dynamic-form                                                       │
│  2: git init && git add -A && git commit -m "Initial commit" (optional)  │
│  3: npm run dev -- --open
Afterward, cd into your project directory and install the Directus SDK by running this command:
npm install @directus/sdk
You need to initialize Directus SDK in your project. Create a file called directus.js inside the ./src/lib directory. Add the following code:
import {
  createDirectus,
  rest,
  readFieldsByCollection,
  createItem,
} from "@directus/sdk";

const directusUrl = "http://localhost:8055";

export const directus = createDirectus(directusUrl).with(rest());
Query the Collection's Fields
Before you can build a dynamic form, you need to know what fields exist in your Directus collection. Instead of manually defining form fields, you can query Directus to retrieve the collection's schema. This allows you to automatically generate form fields based on Directus configurations. It also ensures that field types, labels, and validation rules are respected.
Inside the ./src/lib/directus.js add the following code:
export async function getCollectionFields(collection) {
  try {
    const response = await directus.request(readFieldsByCollection(collection));
    return response;
  } catch (error) {
    console.error("Error fetching collection fields:", error);
    return [];
  }
}
This function fetches the structure (fields) of a given collection. The retrieved field information includes not only basic field properties but also interface types, validation rules, and display options.
Build a form from the data
To make the form dynamic, you need to fetch the collection fields from Directus and generate the appropriate input elements based on their types. This ensures that your form automatically responds to changes in the collection structure without the need for manual updates.
Create a subdirectory called components inside the ./src/lib directory. Inside it, you'll create two files. The first one will be called formLogic.js add the following code:
import { getCollectionFields, submitFormData } from "$lib/directus";

export const categoryOptions = [
  { value: "blog post", text: "Blog Post" },
  { value: "tutorial", text: "Tutorial" },
  { value: "announcement", text: "Announcement" },
];

export const fieldComponentMap = {
  string: "text",
  text: "textarea",
  integer: "number",
  float: "number",
  decimal: "number",
  boolean: "checkbox",
  date: "date",
  datetime: "datetime-local",
  time: "time",
  timestamp: "datetime-local",
  uuid: "text",
  hash: "text",
  json: "textarea",
  csv: "textarea",

  interfaces: {
    dropdown: "select",
    select: "select",
    datetime: "datetime-local",
    markdown: "markdown",
  },

  fields: {
    category: "category-dropdown",
  },
};

export function getFieldComponent(field) {
  if (fieldComponentMap.fields[field.field]) {
    return fieldComponentMap.fields[field.field];
  }

  if (
    field.meta?.interface &&
    fieldComponentMap.interfaces[field.meta.interface]
  ) {
    return fieldComponentMap.interfaces[field.meta.interface];
  }

  return fieldComponentMap[field.type] || "text";
}

export function getValidationAttributes(field) {
  const attrs = {};

  if (field.schema?.is_nullable === false) {
    attrs.required = true;
  }

  if (field.schema?.max_length) {
    attrs.maxlength = field.schema.max_length;
  }

  if (field.schema?.min_length) {
    attrs.minlength = field.schema.min_length;
  }

  return attrs;
}

export async function initializeForm(collection) {
  try {
    const fields = await getCollectionFields(collection);
    const formData = {};
    fields.forEach((field) => {
      if (field.schema && !field.meta?.hidden) {
        formData[field.field] = field.schema.default_value || "";
      }
    });
    return { fields, formData, error: null };
  } catch (err) {
    return { fields: [], formData: {}, error: err };
  }
}

export async function handleFormSubmit(collection, formData, onSuccess, resetFormData) {
  try {
    await submitFormData(collection, formData);
    if (typeof onSuccess === 'function') {
      onSuccess();
    }
    if (resetFormData) {
      resetFormData();
    }
    return { success: true, error: null };
  } catch (err) {
    return { success: false, error: err };
  }
}
The code above acts as the logic layer for handling dynamic form creation. It maps Directus field types to input elements, applies validation rules, and prepares form data structure dynamically.
Create another file called DynamicFrom.svelte. Add the following code:
<script>
  import { onMount } from "svelte";
  import {
    categoryOptions,
    getFieldComponent,
    getValidationAttributes,
    initializeForm,
    handleFormSubmit
  } from "./formLogic.js";

  export let collection;
  export let onSuccess = () => {};

  let fields = [];
  let formData = {};
  let loading = true;
  let error = null;
  let submitting = false;

  onMount(async () => {
    loading = true;
    const result = await initializeForm(collection);
    fields = result.fields;
    formData = result.formData;
    error = result.error;
    loading = false;
  });

  function resetFormData() {
    fields.forEach((field) => {
      if (field.schema && !field.meta?.hidden) {
        formData[field.field] = field.schema.default_value || "";
      }
    });
  }

  async function submitForm() {
    submitting = true;
    const result = await handleFormSubmit(collection, formData, onSuccess, resetFormData);
    error = result.error;
    submitting = false;
  }
</script>

<div class="form-wrapper">
  {#if loading}
    <div class="loading">Loading form fields...</div>
  {:else if error}
    <div class="error">Error: {error.message}</div>
  {:else}
    <form on:submit|preventDefault={submitForm}>
      {#each fields as field}
        {#if !field.meta?.hidden && field.field !== "id"}
          <div class="form-field">
            <label for={field.field}>
              {field.name || field.field}
              {#if field.schema?.is_nullable === false}<span class="required">*</span>{/if}
            </label>

            {#if getFieldComponent(field) === "category-dropdown"}
              <select
                id={field.field}
                bind:value={formData[field.field]}
                {...getValidationAttributes(field)}
              >
                <option value="">Select Category</option>
                {#each categoryOptions as option}
                  <option value={option.value}>{option.text}</option>
                {/each}
              </select>
            {:else if getFieldComponent(field) === "textarea"}
              <textarea
                id={field.field}
                bind:value={formData[field.field]}
                {...getValidationAttributes(field)}
                placeholder={field.meta?.note || ""}
              ></textarea>
            {:else if getFieldComponent(field) === "select"}
              <select
                id={field.field}
                bind:value={formData[field.field]}
                {...getValidationAttributes(field)}
              >
                <option value="">Select {field.name || field.field}</option>
                {#if field.meta?.options}
                  {#each field.meta.options as option}
                    <option value={option.value}>{option.text}</option>
                  {/each}
                {/if}
              </select>
            {:else if getFieldComponent(field) === "checkbox"}
              <input
                type="checkbox"
                id={field.field}
                bind:checked={formData[field.field]}
              />
            {:else if getFieldComponent(field) === "markdown"}
              <textarea
                id={field.field}
                bind:value={formData[field.field]}
                {...getValidationAttributes(field)}
                placeholder="Write markdown content here..."
                rows="8"
              ></textarea>
              <small>Markdown supported</small>
            {:else}
              <input
                type={getFieldComponent(field)}
                id={field.field}
                bind:value={formData[field.field]}
                {...getValidationAttributes(field)}
                placeholder={field.meta?.note || ""}
              />
            {/if}

            {#if field.meta?.note && getFieldComponent(field) !== "checkbox"}
              <small class="hint">{field.meta.note}</small>
            {/if}
          </div>
        {/if}
      {/each}

      <div class="form-actions">
        <button type="submit" disabled={submitting}>
          {submitting ? "Submitting..." : "Save"}
        </button>
      </div>
    </form>
  {/if}
</div>

<style>
  .form-wrapper {
    max-width: 400px;
    margin: 0 auto;
    padding: 1rem;
  }

  .form-field {
    margin-bottom: 1rem;
  }

  label {
    display: block;
    margin-bottom: 0.3rem;
    font-weight: bold;
  }

  .required {
    color: #c62828;
  }

  input,
  textarea,
  select {
    width: 100%;
    padding: 0.5rem;
    border: 1px solid #ccc;
    border-radius: 4px;
    box-sizing: border-box;
  }
  input[type="checkbox"] {
    width: auto;
  }

  /* Help text */
  .hint {
    font-size: 0.8rem;
    color: #666;
  }

  .form-actions {
    margin-top: 1rem;
    text-align: center;
  }

  button {
    padding: 0.5rem 1rem;
    background-color: #4361ee;
    color: white;
    border: none;
    border-radius: 4px;
    cursor: pointer;
  }

  button:disabled {
    background-color: #ccc;
  }

  .loading,
  .error {
    padding: 1rem;
    text-align: center;
  }

  .error {
    color: #c62828;
  }
</style>
This component not only generates appropriate form fields dynamically but also implements client-side validation using Directus field constraints. While Directus ensures data integrity on the server-side, client-side validation enhances user experience by preventing invalid input before submission.
It also adapts to Directus settings, includes a loading state, manages errors, and resets after submission while triggering an optional success callback.
Validate and Save the Data
Once the form passes client-side validation, you need to submit the data to Directus. If the data is valid, it'll send it off to be saved.
Inside ./src/lib/directus.js add the following code:
export async function submitFormData(collection, data) {
  try {
    return await directus.request(createItem(collection, data));
  } catch (error) {
    console.error("Error submitting form data:", error);
    throw error;
  }
}
In the code above,'submitFormData' submits form data to Directus by adding a new entry to the provided collection. The function calls 'directus.request(createItem(collection, data))' to submit the data.
Use the Form in a Page
Create a subdirectory called posts in the routes directory. Inside it, create a file called +page.svelte. Add the following code:
<!-- src/routes/posts/+page.svelte -->
<script>
  import { goto } from "$app/navigation";
  import DynamicForm from "$lib/components/DynamicForm.svelte";

  function handleSuccess() {
    alert("Post created successfully!");
    // Optionally redirect to another page
    // goto('/posts');
  }
</script>

<svelte:head>
  <title>Create New Post</title>
</svelte:head>

<div class="container">
  <h1>Create New Post</h1>
  <DynamicForm collection="posts" onSuccess={handleSuccess} />
</div>

<style>
  .container {
    padding: 2rem;
    max-width: 1200px;
    margin: 0 auto;
  }

  h1 {
    margin-bottom: 2rem;
  }
</style>
Test the Application
To test the application, run this command:
npm run dev
Afterward, navigate to this link http://localhost:5173/posts in your browser. Your dynamic form should be displayed.
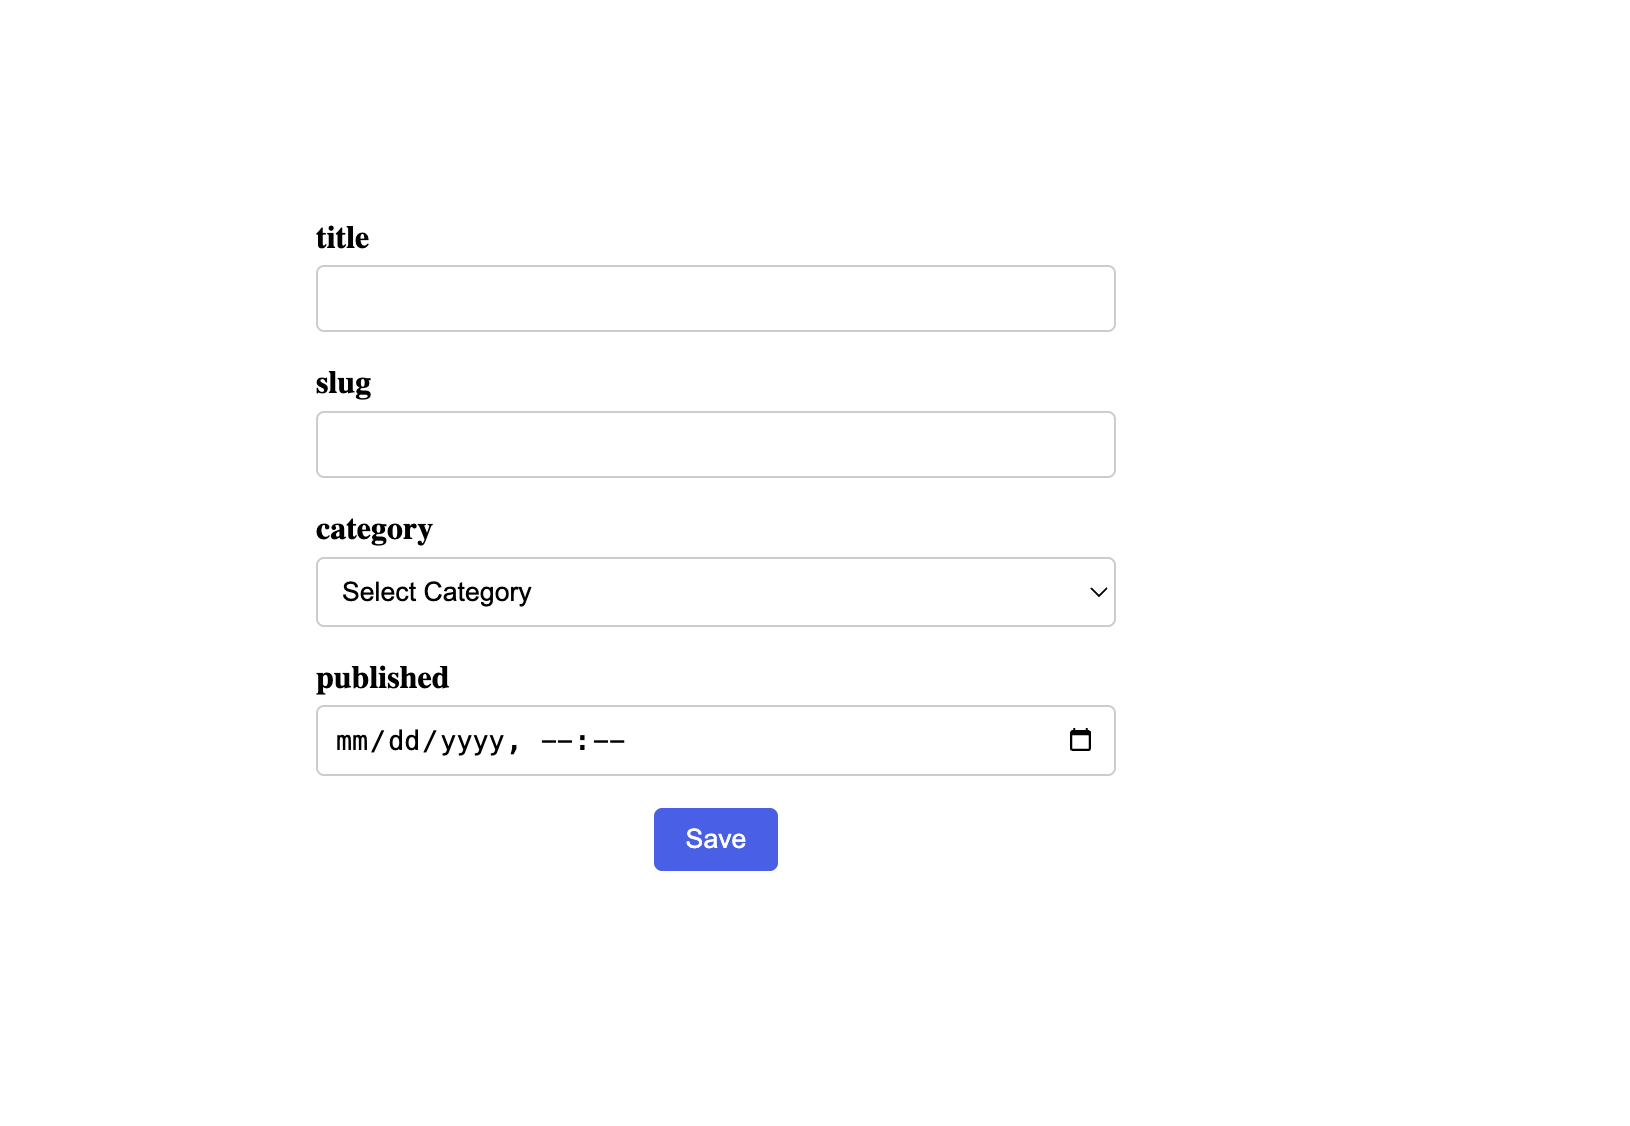
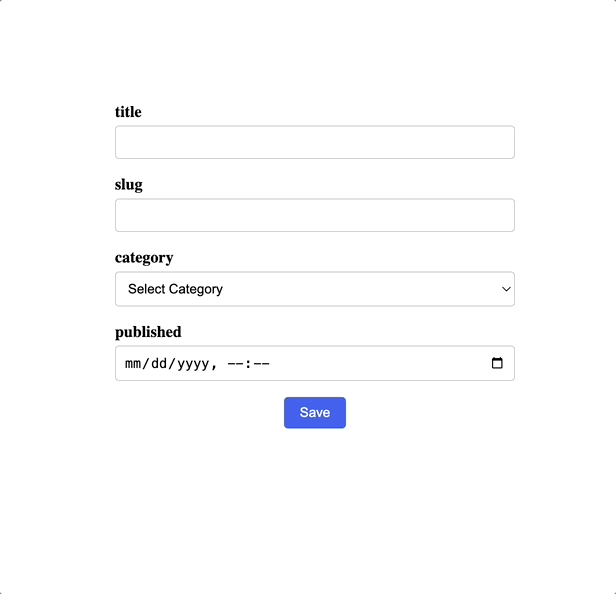
Fill out the form with the necessary details and click submit to create your post:
Summary
You've successfully created a dynamic form system that adapts to your Directus schema. This approach makes your forms more maintainable, as changes to your data structure in Directus automatically reflect in your forms without code changes.
You can also consider improving this by loading and displaying relational data (many-to-one, one-to-many relationships) and implementing more advanced validation logic.